 ToddAh
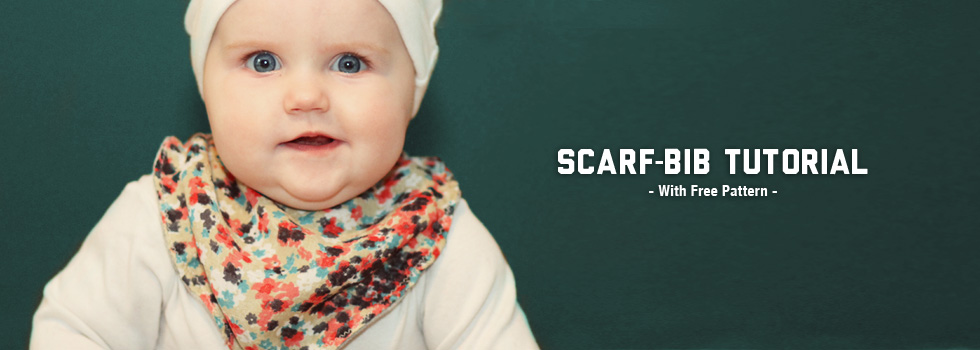
DIY Bib Scarf

First, let me answer the question I know is on everyone’s mind: “Where did you find that super cute baby?” Answer: I made her! Yep, that’s my little one, and she’s quite the model. Like all moms out there, I try to make sure she’s modern and cool, at least most of the time. That being said, I found these super cute little scarf bibs from H&M (which I, of course, purchased instantly), and I just knew I had to make some more to add to her wardrobe! I loved that they were scrunchy, like a scarf, which I hadn’t really seen before. Who knew you could be so fashion-conscious and mess-ready at the same time?! So, I got to work. I used the H&M bibs to make my own little pattern and just kept tweaking until I got the look I wanted. And here it is – my first tutorial ever, complete with instructions and pattern pieces. I would love to answer your questions or get feedback, and I’d love to see pics of your finished products! Enjoy!
What you’ll need:

– scrap fabrics (you can use the same or different fabrics for the front/back)
*I like to use jersey with a bit of stretch for the back, but you can try any fabrics!
– front and back bib pattern
– Liquid Stitch
– snaps
– snap setter tool (unless you are using sew-on snaps)
– basic sewing supplies (scissors, pins, sewing machine, etc)
Steps:
1. Download and print out the free pdf pattern from above. You will need to cut out 2 pieces – one for the front, and one for the back. One is bigger than the other – this is what creates the scrunchy, scarf look.
2. Fold your fabric pieces in half and place the straight edge of the pattern piece along the fold. Like this:

3. Trace and cut one piece for the front, one for the back.
4. With right sides together, pin all the way around, so that the edges match up on both the inside and outside. I start with single pins at each closure tip, as well as a pin at the bottom “V” of the scarf. Then, work your way pinning half way between pins at a time. It will feel like it’s a mess, but trust me, you’re doing it right. Pinning is the most important step! Make sure to pin edges to edges. It will look like this:

5. Mark about ¼” all the way around the bib. This step is important if you’re a sloppy seamstress, like myself! It takes a bit of extra time, but it helps to have a line to follow while I’m sewing! If you’re not sloppy like me, you can skip the marking and just move on to step 6.

6. Using your sewing machine, sew all the way around, following your line, leaving a small hole along the side open. Because I used jersey knit for the back, I chose to use a small zig zag stitch to allow for a bit of stretch. However, you can also use a straight stitch, and it will work just fine.

7. Trim around the edges of your seam (optional) and turn the whole thing right side out. Then, iron the edges flat, making sure to iron the opening, folding the raw edges inside.

8. Close the open hole, using either a hand stitch or Liquid Stitch. I use Liquid Stitch to close the opening. I LOVE Liquid Stitch and recommend it for anyone who may not be the best hand-stitcher (like me:). It dries quickly, and it holds up to wear, washing machines, and dryers!

9. Optional – topstitch about a ¼” all the way around the bib. This step is optional, because you might like the look without the top stitch, especially after ironing. If you don’t want a top stitch, you can skip this one!

10. Add your snaps. You can use sew-on snaps and hand-sew them on, or you can use a snap setter tool (like this one) to add your snaps.

And, there you have it – your very own scarf bib! This size should fit a baby up to at least 12 months. If you need to fit it on a smaller baby, you could just add an extra snap (or even use Velcro) further in, so it’s a bit adjustable. Now, go put it on a baby and be proud of your accomplishment!


82 Comments on “DIY Bib Scarf”
Leave a Reply to TabTodd Cancel reply
Don't Miss Out. We are here too!

Can you just make me some baby scarves?? I’m gonna be a gma!
Congrats, Tiff!! And yes, of course I would make you some:) How exciting!!
Thatnks for the pattern and the tutorial. Made on already and can’t wait to make more!
how do you get the pattern?
Love these! I can already tell this is going to be my new diy obsesion.
*obsession
And do you have a suggestion for a “hole” of some sort to attach pacifier clip to?
Hi Alyssa! You could always make a button hole near the top, if you’re familiar with the button hole maker on your sewing machine:) I’m not a pro at those myself, but there are tons of great little tutorials out there to help out with that. Thanks for stopping by!
When I printed out the pattern it looks small!!! Can you give a measurement perhaps from top to bottom or something like that so I know if it is printing correctly. Thanks!
Hi there! The pattern should take up nearly the entire page, slanted a bit:) The front pattern is about 11″ from top to bottom, and the back pattern is about 10″ from top to bottom. Hope that helps!
Hey when I click to get the pattern for some reason it’s not pulling up is there another trick? Thank you
Hi Tiffany! Are you still having this problem? It should be working now:)
Could this be adjusted for a toddler? If so, how?
Could this be adjusted for a toddler? If so, how??
Hi Whitney! My daughter (21 months) still fits in hers currently. If you wanted to make it bigger around the neck, I would extend the length between the arm (where you put the snap) and the neck hole by about an inch when you are cutting your fabric, and that should help a little:).
Pingback: Two short of a dozen | pensebrox
Hi there. Thaks for the tutorial. I have done it twice, but I cant seem to make it “fluffy” as seen on the picture. What can I do?
Hi Mary! Thanks for stopping by! One suggestion might be to make the pattern piece about an inch to an inch and a half wider. You can do this by printing out the pattern and re-drawing one, just marking that extra inch at the widest part, then working your way gradually back towards the pattern edge near the tips. Does that make sense? Hope it helps!
Mary, Did this work for you? I attempted to follow this tutorial to make two bibs last night and it didn’t have very much fluffy to them. Thanks for all of your help
Thanks so much for this! I also bought the same cute bibs from H&M and was going to tackle making my own. Thank goodness I found your tutorial first! I’m sure it will save me a headache! Thanks again!
Where did you get tool snap tool from? Thanks.
Hi Jennifer! The one pictured was purchased on Amazon: http://www.amazon.com/Dritz-16P-Plier-Kit/dp/B001CE38KW/ref=sr_1_5?ie=UTF8&qid=1354392416&sr=8-5&keywords=dritz+snap+tool
Lately, I’ve been using a plastic setter tool that I like a lot better (much easier to use!). I got that one on etsy: https://www.etsy.com/transaction/142874865
I’m so excited to try this out!! It’s super cute and can make them to match anything! Thanks for sharing!!!
Pingback: 100+ Free Scarf Patterns - The Sewing Loft
Thanks for this! Found you on Pinterest and used your pattern. Turned out great!
You’re welcome! So glad it turned out. Thanks for the kind words.
These are ADORABLE and I know the parents of my nanny kids will love them! Thank you!
Hi! How much fabric should I get for each side??
I’m wondering if liquid stitch would work for the whole thing? I don’t have a sewing machine but really want to try these! Thanks:)
Hmmm… I suppose you could liquid stitch the whole thing if you wanted, but I would maybe liquid stitch in steps and make sure to leave enough time for it to completely dry each time. So, liquid stitch inside out, leaving a hole for turning, put a book or something heavy on top and let it sit for at least a few hours. Then turn right-side out and finish off the small hole the same way. You wouldn’t have the final top stitch, but it’s not really necessary to get the look:). Let me know how it turns out!
Great post! I’ve wanted to make something like this for a while and for some reason didn’t think of making the one side bigger to add the puff… haha. You can tell I am new to sewing. Thanks for the tutorial!
where did you buy your fabric?
We get most of our fabric from girlcharlee.com
Pingback: Baby Gusset Pants and Scarf Bib | penny sew vintage
HI there! love the idea for this…but I can’t get the page to load for the pattern…tried making one myself and didn’t turn out….can you help?
Oh no! Try this link and let me know if you’re still having trouble: https://toddah.net/wp-content/uploads/2013/08/Scarf-Bib_Pattern.pdf
I dont think im doing it right…. it doesnt cpme out puffy is there a type of fabric I have to use..
Hi there! Every fabric may come out a little differently, depending on the stretch and feel. You could try making the front piece even a little larger if you’d like for it to be “puffier.” Unfortunately, we don’t have a video tutorial. I would recommend using the front piece as a guide, but perhaps drawing a new pattern about an inch or so bigger around the side and bottom portions if you’d like. Just print it out, then measure one inch along the sides, then connect the dots. Hope that helps!
These are so stinking cute! Can’t wait to make them for my granddaughter. Do you wash your fabric first?
Hi Lizzie! I didn’t pre-wash these particular fabrics, but you absolutely could!
Thanks so much! I have been looking every where for a great gift idea for our newest grandchildren………..
Your Welcome!
Thanks so much! I have been looking every where for a great gift idea for our newest grandchildren………..
I have tried making 2 of these for my granddaughter but the pattern seems so small. When I cut it out and sew it, it looks like its made for a doll. What can I do to make it bigger? Do I just use the same pattern and enlarge it?
Hi there. Oh no! When you print the pattern, make sure you do not print it to scale – each pattern piece should take up an entire page. When you print it, does it take up the whole page?
Yes, I t took up the whole page but it still seemed small and it did not have that ” slouch” look that the picture had. Thanks for your quick response.
Hmmm… You could try just tracing a new pattern for the outer fabric, measuring an extra 1/2″ around the edges to make the front fabric bigger, which would give it more of the slouchy look. I wouldn’t make it bigger at the part where it goes around the neck – just the sides and bottom. The bigger difference there is between the front fabric and the back fabric, the more slouch you’ll get:)
I just made four of these for my sister in law for a baby shower gift. I used liquid stitch on the whole thing instead of sewing because I do not trust myself with a sewing machine haha. They turned out great. Thanks for your tutorial!
This looks super easy and I can’t wait to try it out, but I’m wondering if they would even look right on a baby boy? Maybe getting certain prints like camo would look better? What do you think?
Yeah I think it could work with the right fabric. We did a flannel one that we’ve given to boys. Sometime soon I think we will do another tutorial for a bandana bib.
Pingback: 25 Awesome Scarf Projects to Try This Summer
I cannot get the link to the pattern to work. Any other way to get it?
Hi Michelle! I will email you, so be on the lookout!
Los, what type of fabric do you use for the front?
Hi Michelle,
I used a few different types – jersey knit, cotton flannel, and poly-cotton! Just make sure you use something washable, since it will be getting drool and all kinds of fun baby mess on it:)
Sorry but, the pattern download link didn’t work. Could you fix and email it? Thanks!
Yep – just emailed you!
Love these! I can’t get the pattern to pull up! 🙁 could you email me a link?
Great pattern. My first wasn’t poofy, but I think that’s because I used fleece for the bottom. I think the top sticks to the fleece and doesn’t move. Definitely make sure to use fabrics that move easily against each other. I’m thinking of using another fabric for a middle layer since I do want to make these absorbant and like the fleece.
Thanks for the feedback, Janina! One thing you could try is making the outer edges and bottom (V) of the front fabric about 1-2″ larger than the printed pattern. Just don’t make the arms (or the part that goes around the neck) bigger. 🙂
Just found you via Pinterest and am so excited to make them – I’ve got some major droolers in my house! Thanks for the easy tutorial and pattern.
Hi,
I also couldn’t get the link for the pattern to work.
Thanks!
Hi,
I would love to try making this but can’t get the link to the pattern to work. Do you mind emailing it to me?
Thank you!
Laura
I too need the pattern emailed to me… been searching for days for this particular pattern…gonna make a passel of them to ship to my princess in England. thank you for sharing your talents
I tryed this and it looks nothing like yours. Webt by the pattern you provided
Hi Crystal! Sorry to hear that – could you send me a picture of your finished product? What types of fabrics did you use? Feel free to email shoptoddah@gmail.com with this info and I’ll see what I can do to help:)
I have liked you on Facebook but still can’t get the link for the pattern to show up. Any ideas?
I am looking forward to making some of these for my granddaughter, but I can’t get the download to work. Thanks for your help.
Never mind! went back in this morning and it worked! Got the pattern and am ready to start sewing.
I can’t get the link to the pattern to pull anything up :-/
The link for the pattern will not open for me.
Hi…….would it be possible to make this reversable? I love the “scrunchy” look to it. Thought about cutting front and back same size, but don’t know if it would totally eliminate the “scrunchy” look. Also, for some reason I couldn’t download the pattern. Thanks for your help! Love your stuff!
Hi there! I have tried to download the pattern, but the link doesn’t work for me. Can you please email it to me?
I am trying to get your free pattern. I have “liked” your page and still can’t figure out how to get. Please help. Thank you!
Hi, I liked your Facebook page I can not get the link to open the page for the patter. Any ideas to help with this would be appreciated. Thank you!
Hello, I’m wondering what fabric do you think works the best for the front and back? I’m not sure what kind to buy. Thank you so much!
I don’t have Facebook, is there another way to get the template? Thanks!
Hi Ashley,
No problem! Even if you don’t have Facebook, you can still access the pattern links directly on our Facebook page! There is a pinned post at the top of the page and you can find the links there:)
Thank you so much for this lovely pattern.
I’m looking for an infinity scarf\snood pattern with the backing for dribbling too. Can anyone direct me to a link please.
Thank you
🙂
Hmmm… I don’t know of any off the top of my head, but will be sure to reach out if I come across one;)
I can’t get the PDF to open. I was trying to find you on Facebook also but am having no luck. Is there something I might be doing wrong? Thank you and can’t wait to try these. So cute.
Hi Lori – should be working now – sorry about that!
Did anyone find they needed to create a small pleat with the top fabric? Mine just had too much excess. I have 10 more cut, so I want to know if it’s just me? The bottom fabric I used was the dotty fleece. Thank you!